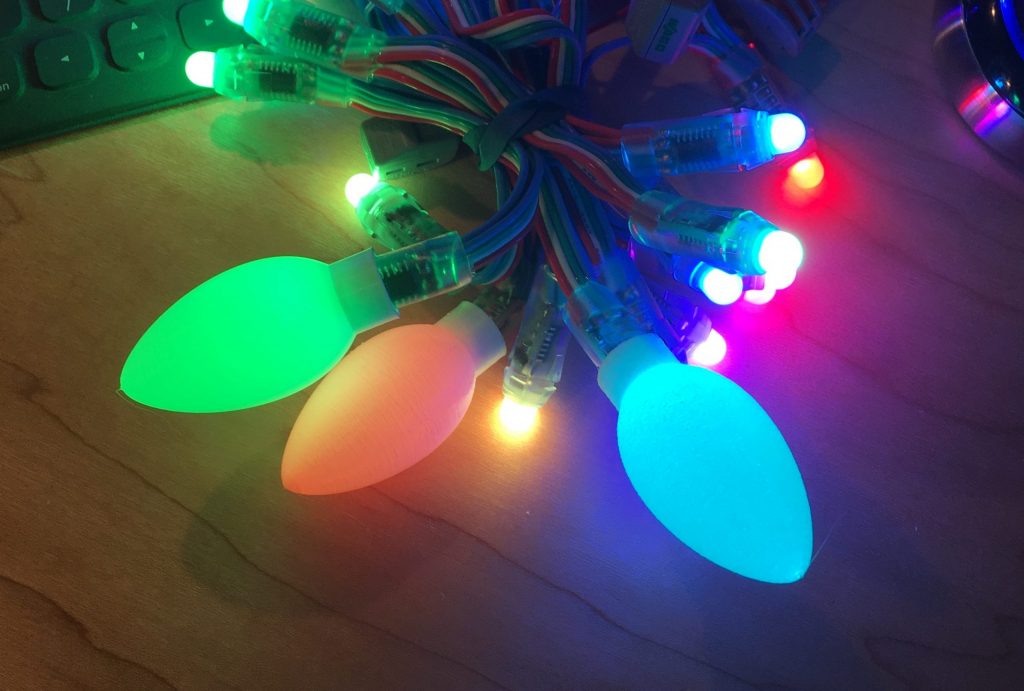
Sometimes, good things go away — such as the frosted C9 bulbs. You know, the ones where the paint chips off. Yeah, those frosted C9 bulbs of Charlie Brown goodness.

This IS About the Diffuser
No offense, Arduino. I love you and want to give you a great big bear hug because you are amazing, but you’re represented quite well in the world and I don’t have much to add.
But, the world seriously needs to bring back the nostalgic C9 bulb, and that’s what I’m here for.
This is NOT About the Arduino, Code, or Power
I’d rather not cover things that have already been covered.
- Adafruit already wrote a great article on power. Read it.
- Adafruit also has a sa-weet NeoPixel Überguide.
- Wanna Pseudo-Async like it’s Pseudo-1999? Adafruit wrote an article about that, too. I use their technique often — including in my Smoking LED Candle.
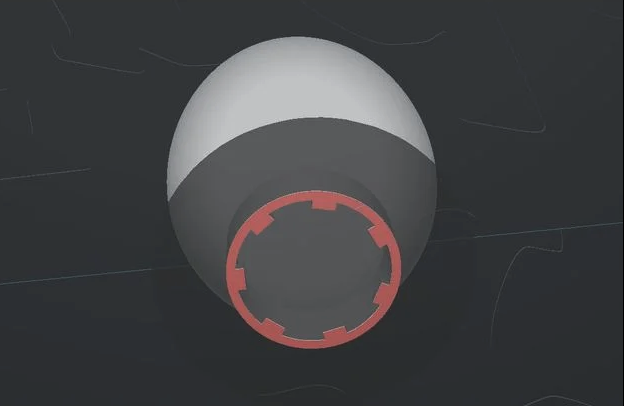
A friend and I designed a proper C9 LED diffuser for the WS2811 12mm NeoPixel LEDs.

By proper, I mean we modeled the C9 diffuser after an actual C9 bulb. Because that’s how proper is done.
AND it clips on! Consider that properer.


It clips on. With tabs. No glue necessary.

Download the C9 .STL
Download the C9 Diffuser STL model from Thingiverse
https://www.thingiverse.com/thing:3331268
Slice It However You’d Like
Spiral or Fuzzy. I prefer fuzzy.
Option 1: Vase Mode (Spiral Mode)
Vase mode only really works for 1 bulb at a time. Just be sure to add 1–2mm of “bottom” layers so the tabs get printed with full thickness & strength.
Option 2: Slice It Fuzzy w/ Cura (← do this)
I print an entire bed of these C9 diffusers overnight using the “Fuzzy” mode in Cura. Cura’s fuzzy mode hides the seams exceptionally well. (or so it…seams.)


Fuzzy Wuzzy Wuz A Cura Setting:
You may need to adjust your fuzzy settings. Here are the settings I like with PLA:

- Fuzzy Skin: CHECK
- Fuzzy Skin Thickness: 0.15mm
- Fuzzy Skin Density: 1.25mm
- Fuzzy Skin Point Distance: 0.8mm


What Material?
Shoot, that’s up to you! I’ve printed these in PET-G and PLA. After a year, both look great. But mine haven’t been in direct sunlight. (In other words, I used PLA but don’t take my advice — try for yourself!)
I’m personally a huge fan of Hatchbox’s predictably consistent filament:
- Hatchbox PLA (white): https://amzn.to/34PRael
- Hatchbox PET-G (white): https://amzn.to/2rZG9ZG
What 3D Printer?
I don’t think it really matters for these puppies — but I used my trusty Creality Ender 3 (typically in the $200 range). It is (and has been) my go-to printer for everything even though I have a bigger, newer printer.