
There’s one thing I can’t stand: that unused wall space where a door opens. The next few home projects involve reclaiming some of that space. In our house, a few spaces (such as this one) have 9 inches of depth…and 9″ is plenty for some bookshelves.
Design considerations:
- Open shelving is a must. I wanted these shelves and their contents to feel like part of the room, rather than closing itself and its contents off from the room.
- I’m a sucker for subtle curves. They add several extra steps to the build process, but it’s totally worth it. Somehow the subtle curves help blend the unit with the room itself.
- Structural elements must be part of design.
- Must be able to move this unit elsewhere. I mounted this so that it can simply be lifted upward to detach it from the wall. The design is based on 16″ centers to be easily compatible (and strong) in many places of a home.
- No visible fasteners.
- Variety of wood species. Our house has solid oak doors, oak trim, oak cabinets, oak oak oak oak.. It’s nice, but it’s just a lot of oak, oakay? Long term, we would like for a natural mix of wood species around our home. This shelving unit is a deep dive into providing a basis for the mix. Its purpose is really to bring all the species of wood together, and say “See? Look how well we all get along.”
- Hardest wood on bottom shelf. This was strategic. This is the shelf that’s going to take the most beating. It’s kid-height and will have kid toys pounding on it daily.
- Naturally supportive joinery. In fact, the shelves are not actually attached to the supports other than a resting friction fit. The joinery is designed to prevent movement in the directions these shelves will naturally want to move when pressure is applied.
The Useless Space
Tape marks the studs.

SketchUp drawing of my joinery plan.

Cutting Joinery Dadoes in Supports
For these upcoming dado crosscuts, I needed as little table friction as possible. So I waxed the saw & wing.
Problem: the wing was wavy, worn, and not very flat. Even when waxed, the contours caused too much friction and would have caused the wood to catch and start angling.


So, I made a new wing.


Here you can see why friction would be a negative thing. Clamping the long supports to the miter gauge fence helped quite a bit, but a single track miter gauge isn’t quite hefty enough to handle the twisting that may be associated with this heavy board getting caught up at one of the ends.

Fun fact: Stacked dado blades, such as this one, are outlawed in the UK due to safety concerns.
Here, I’m creating a template for the curves.

Curves, dadoes cut into supports:


This is the back side, prepared to route the recesses for the hardware. I forgot to take pictures of the hardware used, but I used 6 keyhole style metal plates.
The Shelves
This is the absolute best burr I’ve ever put on a card scraper. If you’ve never used a card scraper, this is probably not impressive.

Cutting the notches
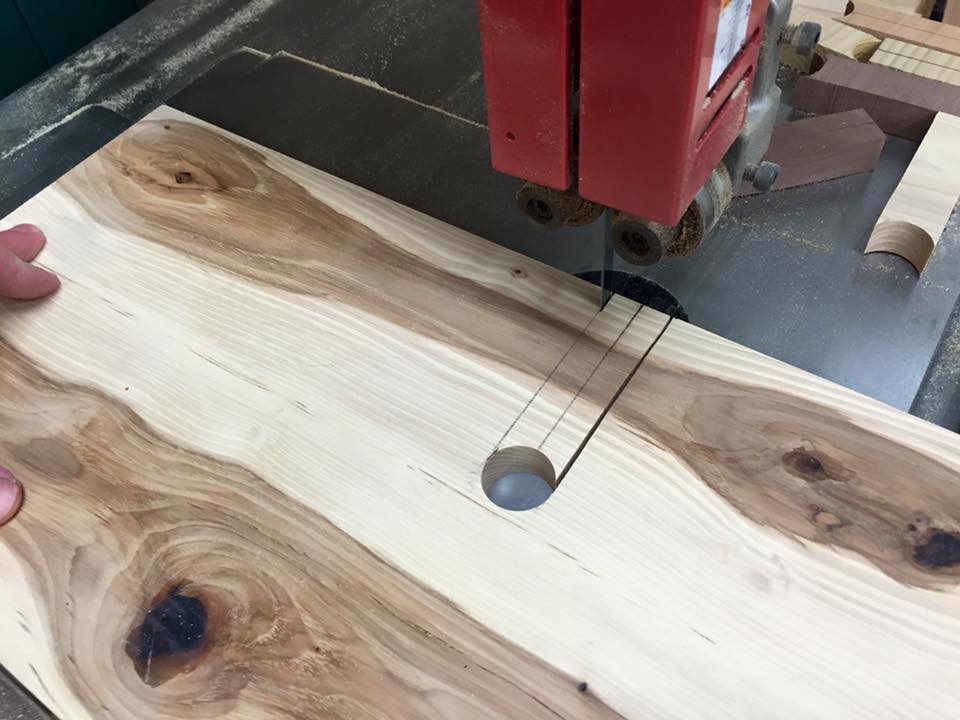


A dry test fit.
Time to make some curves. I rough cut them with the bandsaw, then clamped them together and cleaned them up with the spokeshave.

Black Gesso
This is my first time using the stuff. It’s intended to be used as a primer for canvas (Bob Ross used it under his paintings) but the properties of it looked really promising for my usage. It can handle wood movement, it takes a finish well, texture can be added to it, it can be sanded after drying, the drying time is quick, and it cures nice and hard.

I’m applying Varathane’s water-borne polyurethane. It goes on blue, but dries clear and will not yellow/amber with age. Due to the non-yellowing, I also used this for the Maple & Hickory shelves further (farther?) below.


Closeups of texture. This was simple. Wavy brush strokes.

Test fit in-place. The door trim was totally in the way.
Shelves Up Close
Pre-Finish: Before applying the water-borne finish, I applied two coats of 1lb cut dewaxed shellac. For practical purposes, this prevented the grain from raising when applying the water-borne Poly. For show, dewaxed shellac is good about bringing out depth in Walnut & Cherry in particular.
Two topcoats used:
- Varathane Water-Borne Poly (for Maple, Hickory)
- GF Enduro-Var Water-Borne Poly (for Walnut, Sassafras, Cherry)
Hard Maple w/ Varathane:

Hickory w/ Varathane:

For the next 3 shelves, I used my absolute favorite of waterborne finishes: Enduro Var by General Finishes (check it out here). It’s a cross-linking waterborne finish that has some add-ins and properties that make it resemble more of a lacquer or oil based finish. But, it has a slight ambering effect, which is desirable on the species below. Enduro-Var rocks.
Walnut w/ Enduro-Var


Sassafras w/ Enduro-Var

Cherry w/ Enduro-Var

Consider it done. Because, well, it is.

